Enterprise Recon 2.5.0
Target Credentials
Manage credentials for Target locations that require user authentication for access in the Target Credentials page.
The section covers the following topics:
- Credential Permissions
- Using Credentials
- Add Target Credentials
- Edit Target Credentials
- Set up SSH Public Key Authentication
Credential Permissions
Resource Permissions and Global Permissions that are assigned to a user grants access to perform specific operations for Target credentials.
| Operation | Definition | Users with Access |
|---|---|---|
| View credentials | Access to view credentials when setting up a scan or via the Resource Permissions Manager. |
|
| Add credentials | User can add credentials when setting up a Scan for a Target. |
|
| Add credentials (Global) | User can add credentials for all Target platforms via Target Credential Manager. |
|
| Use credentials | Access to use credentials when scanning a Target. |
|
| Edit credentials | User can edit credentials. |
|
Global Admin users have full access to all credentials. A Permissions Manager user can view all existing credentials and assign users permissions to use or edit these credentials via the Resource Permissions Manager.
All users can Add Target Credentials, but can only use or edit the credential sets to which they have been explicitly assigned permissions to.
See Resource Permissions for more information.
For remote scanning of live target types, the configuration of credentials is required for each account unless otherwise stated.
For supported target types where no specific version is specified, Ground Labs support is limited to versions the associated vendor still provides active support, maintenance and software patches for.
Supported platforms may change from time to time and this is outlined in this product documentation.
Using Credentials
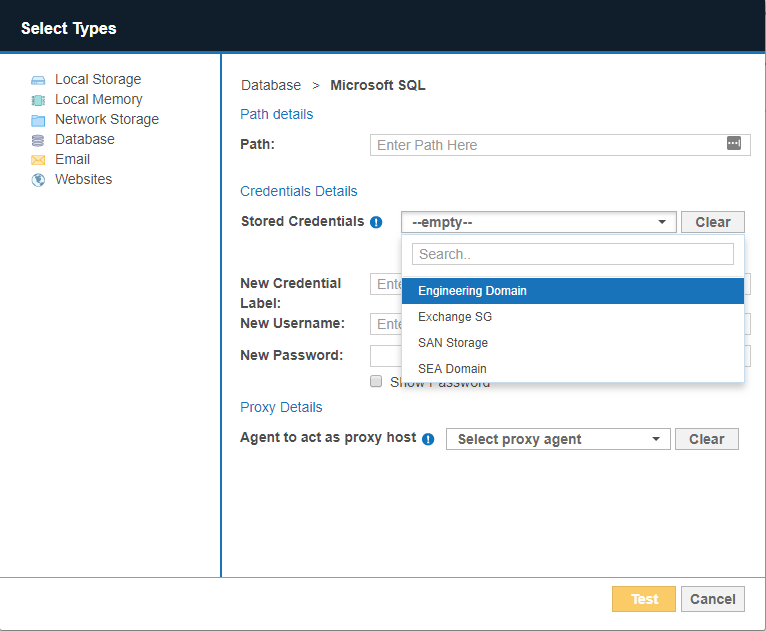
Credential sets that are saved in Target Credentials appear in the Stored Credentials field when adding Targets to scan.

You can use a new credential set when you enter a value in the Credential Label, Username and Password fields.
Once the Target is added to ER2, the Credential Details that were provided are automatically saved to Target Credentials under the specified Credential Label.
Add Target Credentials
A user can add new credentials to ER2 in two ways:
- When you Start a Scan, the credentials used for that scan are saved to ER2.
- Add a credential set through the Target Credentials page.

Add a Credential Set Through the Target Credentials
- Log in to the ER2 Web Console.
- Go to Settings > Target Credentials.
- On the top-right of the Target Credentials page, click + Add.
- In the New Credentials page, enter a descriptive label in the Credential Label field.
-
Select the Target Type:
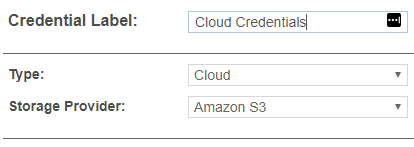
Target Type Description Cloud From the Storage Provider list, select your cloud storage provider.
Each cloud storage provider requires different credential formats. See Add Targets.

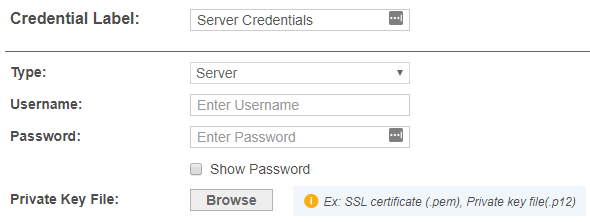
Server In the New Credentials page, enter your:
- User name.
- Password.
- (Optional) Click Browse to upload a P12 key or SSL certificate. See Set up SSH Public Key Authentication for more information.
Users automatically have use and edit permissions for credential sets that they create.
Edit Target Credentials
You can edit previously saved credentials through Target Credentials:
- Hover over the Target credential set that you want to edit on the Target Credentials page.
- Click Edit to edit the credentials.
Set up SSH Public Key Authentication
The following example values are used in the sample command lines below:
- Proxy Agent host name: AGENT-HOST-A
- Proxy Agent user name: user-A
- Remote Target host name: REMOTE-HOST-B
- Remote Target user name: user-B
To set up a SSH Public / Private Key-pair for authentication:
- Login to the Proxy Agent host machine AGENT-HOST-A.
-
Open a terminal and run the following command to generate a SSH public / private key-pair:
ssh-keygen -t rsa -
The ssh-keygen command asks for the following information:
Prompt Response Enter file in which to save the key (/home/user-A/.ssh/id_rsa): Leave as default and press Enter key. Enter passphrase (empty for no passphrase): Enter passphrase and press Enter key. Enter same passphrase again: Re-enter passphrase and press Enter key. -
In the same terminal on AGENT-HOST-A, use ssh to create a directory ~/.ssh as user-B on REMOTE-HOST-B and enter user-B's password when prompted.
ssh user-B@REMOTE-HOST-B 'mkdir -p ~/.ssh' -
Append user-A's new public key to the user-B@REMOTE-HOST-B:~/.ssh/authorized_keys file on REMOTE-HOST-B and enter user-B's password when prompted.
cat ~/.ssh/id_rsa.pub | ssh user-B@REMOTE-HOST-B 'cat » ~/.ssh/authorized_keys' -
On the Proxy Agent host machine (e.g. AGENT-HOST-A), convert the private key file ~/.ssh/id_rsa to the required .pem format. Enter the passphrase for the private key (from Step 3) when prompted.
# Syntax: openssl rsa -in <input-private-key-file> -outform PEM -out <output-pem-file> openssl rsa -in ~/.ssh/id_rsa -outform PEM -out ~/.ssh/id_rsa.pem - Login to the remote Target host machine REMOTE-HOST-B.
-
Change the folder and file permissions as follows:
chown user-B ~/.ssh ~/.ssh/authorized_keys chmod 700 ~/.ssh chmod 600 ~/.ssh/authorized_keys -
Check the /etc/ssh/sshd_config file and verify that Public Key Authentication is allowed for the remote Target host.
# The following line must be uncommented
PubkeyAuthentication yes