Enterprise Recon 2.13.0
Set Censorship Level
This section covers the following topics:
Overview
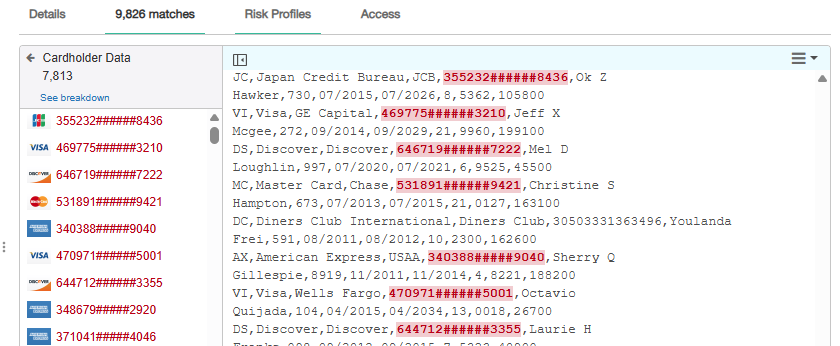
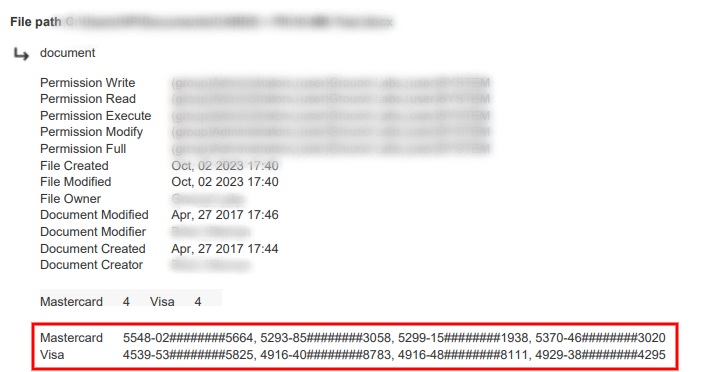
To ensure compliance with data protection regulations, ER2 implements match censorship. This means that sensitive data matches are always masked dynamically when displayed within the Enterprise Recon web UI and in the generated reports.
Match Censorship
Matches are visually masked using the character “#” to obscure the sensitive data
- in the Match Inspector window:
 .
. - in the reports:
 .
.
Censorship Levels
Censorship in ER2 has three predefined levels:
| Level | Description |
|---|---|
| 1 | Mask non-test payment card numbers according to PCI DSS standards. This is the default censorship level in ER2. |
| 2 | Mask all non-test sensitive data using a length-based heuristic. Payment card numbers are always masked according to PCI DSS standards. |
| 3 | Mask all characters of all detected matches. |
While the censorship level is set to “1” by default, you can change it to any of the predefined levels in the table above. This enables your organization to meet regulatory requirements, including the prevention of data export.
The configured level applies across all areas of the Enterprise Recon UI and reports where matches/match samples may be displayed.
Configure Censorship Level
To set the censorship level in ER2, perform the following steps:
- Log in to the Master Server console.
-
Run the following commands:
# Open the datastore client er2-dsclient
# (Optional) Identify current censorship level get config/policy/autocensor
# Set the censorship level # Syntax: set config/policy/autocensor <level> set config/policy/autocensor 3
# Exit datastore client exit
# Restart the Master Server /etc/init.d/er2-master restart -
Scan or rescan locations.
The new configuration applies to subsequent scans across all areas of the Enterprise Recon UI and reports where matches/match samples may be displayed. Locations scanned before the change must be rescanned for the new configuration to take effect.