Enterprise Recon 2.6.0
vSphere
This section describes how to create a virtual machine on a VMware ESXi server with the vSphere client and install ER2 on it.
Requirements
- An existing VMware ESXi server, and a computer with the vSphere client installed. See VMware Docs: Introduction to vSphere Installation and Setup for more information.
- These instructions have been tested for VMware ESXi 6.5 using the VMware Host Client.
- See System Requirements for information on ER2 requirements.
- A copy of the ER2 ISO installer.
Create a New Virtual Machine
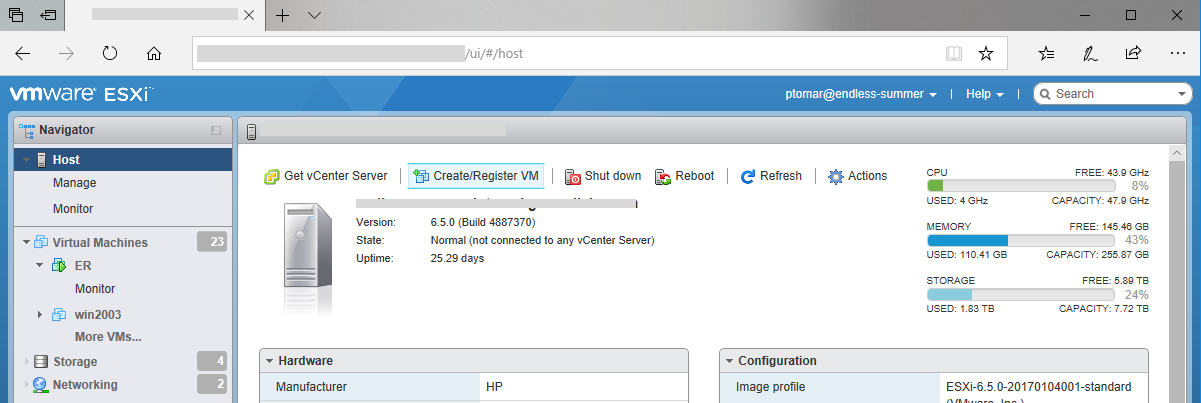
- Connect to VMware ESXi 6.5 using the VMware Host Client.
- In the Navigator pane, click on Host.
- Click on Create/Register VM to open the New virtual machine wizard.

- On the Select creation type page, select Create a new virtual machine and click Next.
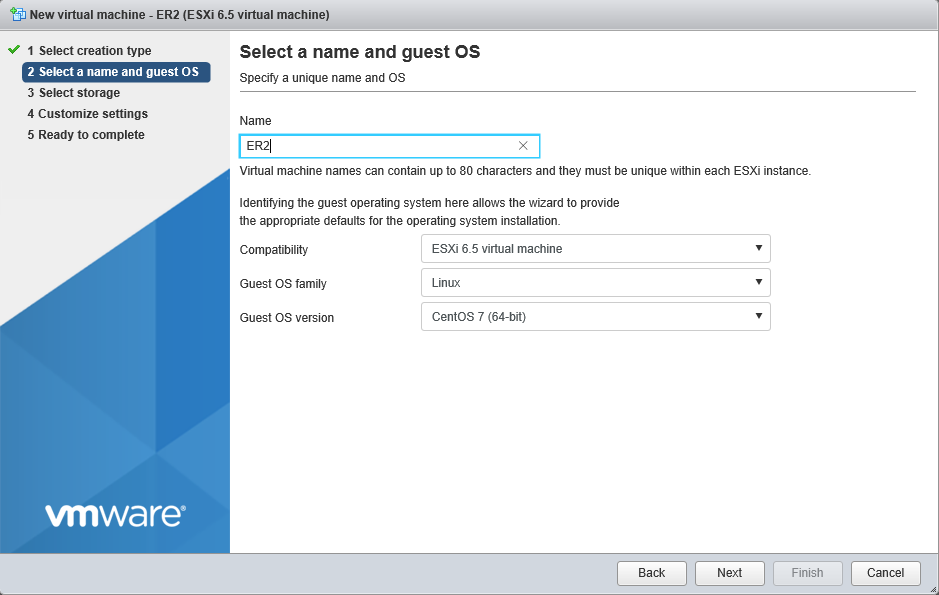
- On the Select a name and guest OS page, provide a meaningful Name for the virtual machine. Fill in the following fields and click Next:
- Compatibility: ESXi 6.5 virtual machine
- Guest OS family: Linux
- Guest OS version: CentOS 7 (64-bit)

- On the Select storage page, select the destination storage for the virtual machine and click Next.
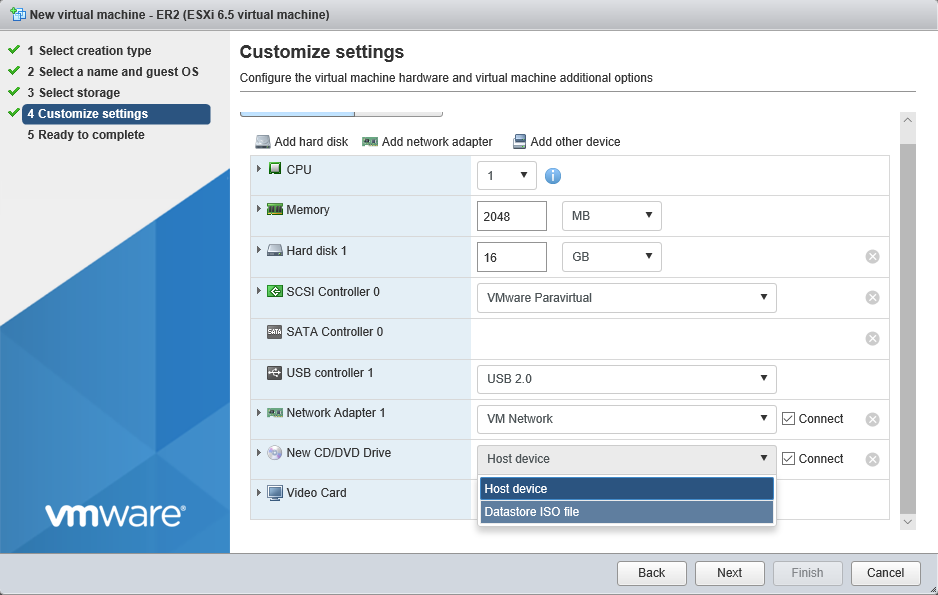
- On the Customize settings page, do the following and click Next:
- Memory: Enter the memory to be allocated for the virtual machine.
- Hard disk 1: Enter the disk size for the virtual machine.
- Network Adapter 1: Select VM Network and select the Connect checkbox.
- CD/DVD Drive 1: Select the ER2 ISO file and select the Connect checkbox to automatically connect the CD/DVD drive at power on.

- On the Ready to complete page, review the configuration settings for the virtual machine. Click Finish to complete the setup.
Install ER2 on the Virtual Machine
- Open the VMware Host Client, select the new virtual machine from the Navigator > Virtual Machines pane.
- Click the Power on button to start the virtual machine.
- Follow the instructions to Run the Installer.