Enterprise Recon 2.6.0
Install Node Agents
For platform-specific installation instructions, see:
For a complete list of supported operating systems (OS), see System Requirements.
For Windows and Linux hosts, use the appropriate Agent installers:
- Use the 32-bit Agent installer for hosts with a 32-bit OS.
- Use the 64-bit Agent installer for hosts with a 64-bit OS.
For Proxy Agents scanning remote Targets, refer to the requirements listed under their specific pages in Scan Locations (Targets) Overview.
Manage Node Agents
After installing the Agent, you must verify it with the Master Server before it can be used to scan Target locations. For more information, see how to Verify Agents.
For more information on how to view, delete and block agents, see Agent Admin.
(Optional) Master Public Key
What is the Master Public Key
The Master Server generates a Master Public Key which the Node Agent can use to further secure the connection between the Node Agent and the Master Server.
When a Node Agent is configured to use a fixed Master Public Key, it only connects to a Master Server using that Master Public Key. This mitigates the risk of route hijacking attacks.
Configure Agent to Use Master Public Key
The Master Public Key can be found on the Server Information page on the Web Console.
On Unix and Unix-like systems, configure the Agent to only connect to a Master Server that uses a specific Master Public Key with the -k flag. On the Agent host, run as root in the terminal:
er2-config -k <master-public-key>
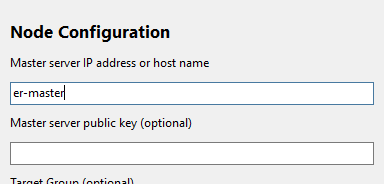
On Windows, open the Enterprise Recon Configuration Tool and fill in the Master server public key field:

For detailed instructions to configure the Master Public Key for an Agent, see the respective Agent installation sections.