Enterprise Recon 2.1
Targets Page
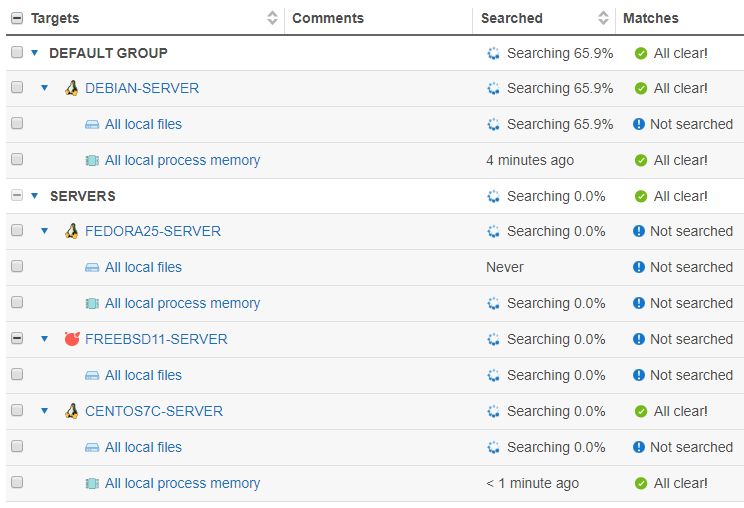
The Targets page displays the list of Targets added to ER2. Here, you can perform the following actions:
- Start a Scan
- Manage existing Targets
- Generate Reports
This section covers the following topics:
Permissions
A user must have at least Scan, Remediate or Report permissions to see a Target in the Targets page.

To see all Targets, you must be a Global Admin or be explicitly assigned Scan, Remediate or Report permissions for all Targets.
To access features for managing a Target, you must have Global Admin or System Manager permissions.
For more information, see User Permissions.
List of Targets
The list of Targets displays the following details:
- Targets: Target names and location types.
- Comments: Additional information for Targets. Error messages are also displayed here.
- Searched: Scan Status and progress.
- Matches: Match Status.
Filter the list of targets by selecting criteria from the top-left. You can filter the list of Targets by:
- Target Group: Displays information only for selected Target Group. Defaults to "All Groups".
- Specific Target: Displays information only for the selected Target. Defaults to "All Targets".
- Target Types: Displays information only for selected Target types (e.g. "All local files"). Defaults to "All Types".


Scan Status
| Scan Status | Description |
|---|---|
| Searching x.x% | Target is currently being scanned. |
| Manually paused at x.x% | Scan was paused in the Schedule Manager. See Scan Options for more information. |
| Automatically paused at x.x% | Scan was paused by an Automatic Pause Scan Window set up while scheduling a scan. See Automatic Pause Scan Window for more information. |
| Previously scanned | The length of time passed since the last scan. |
| Previously scanned with errors | The length of time passed since the last scan. The last scan finished with errors. |
| Incomplete | ER2 cannot find any data to scan in the Target location. For example, a scanned location may be incomplete when:
Check configuration
Check that your Target location is not empty and that your configuration is correct. |
Match Status
| Match Status | Description |
|---|---|
| Not searched | Target cannot be accessed, or has never been scanned. |
| Prohibited | Scanned locations contains prohibited PCI data, and must be remediated. |
| Matches | Scanned locations contain data that match patterns that have been identified as data privacy breaches. |
| Test | Scanned locations contains known test data patterns. |
| All clear! | No matches found. No remedial action required. |
Manage Targets
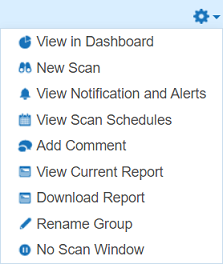
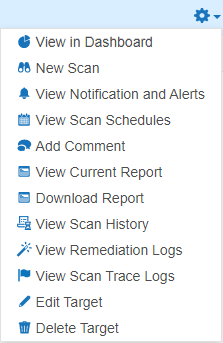
To manage a Target Group or Target, go to the right hand side of the selected Target Group or Target and click on the options gear  .
.
 |
 |
Users with Global Admin permissions have administrative rights to perform all available actions to manage a Target or Target Group.
Users with Remediate and Report permissions can only View in Dashboard and View Current Report for their assigned Targets or Target groups.
Resource permissions and Global Permissions that are assigned to a user grants access to perform specific operations on the Targets page.
| Option | Description | Users with Access |
|---|---|---|
| View in Dashboard | Opens the Dashboard view for the selected Target or Target Group. |
|
| New Scan | Starts a new scan with the selected Target or Target Group. |
|
| View Notifications and Alerts | Opens Notification Policy and filters results to show only the selected Target or Target Group. |
|
| View Scan Schedules | Opens the View and Manage Scans and filters results to show only the selected Target or Target Group. |
|
| Add Comment | Adds a comment to the selected Target / Target Group. To add a comment:
|
|
| Edit Comment | Edits comment previously added to the selected Target / Target Group. To edit a comment:
|
|
| View Current Report | Generates the latest report for the selected Target or Target Group and displays it.
To save the generated Report, click Save This Report. |
|
| Download Report | Brings up the Save Target Group Report or Save Target Report dialog box to download the Target Group or Target report. See Reports for more information. |
|
| Rename Group | Renames the Target Group. |
|
| No Scan Window | The No Scan Window allows you to schedule a period during which all scans are paused for that Target Group.
Setting a No Scan Window here does not create an entry in the View and Manage Scans. You can only check for an existing No Scan Window by opening the Target Group’s No Scan Window. |
|
| View Scan History | Displays the Scan History page for the selected Target. See Scan History for more information. |
|
| View Remediation Logs | Displays the Remediation Logs for the selected Target. See Remediation Logs for more information. |
|
| View Scan Trace Logs | Displays the Scan Trace Log for the selected Target. See Scan Trace Logs for more information.
The Scan Trace Log is only be available for a Target if you had started a scan with the Enable Scan Trace option selected in the Set Schedule section. |
|
| Edit Target | See Edit Target. |
|
| Delete Target | Delete a Target permanently from ER2.
Deleting a Target removes all records associated with the Target
from ER2. Once deleted,
the action cannot be undone.
The Ground Labs End User License Agreement only allows you to delete a
Target if it has been permanently decommissioned.
|
|
Inaccessible Locations
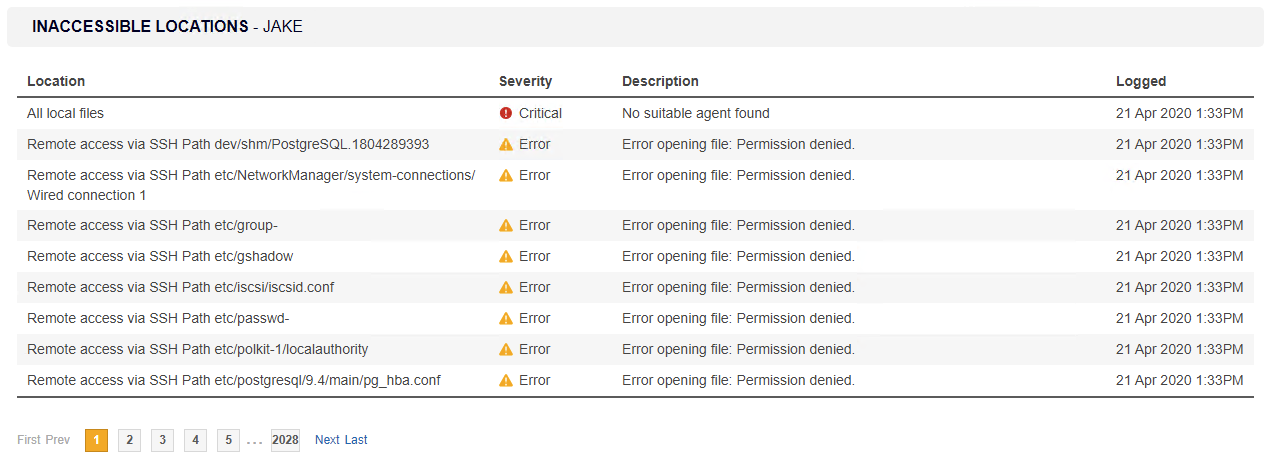
When ER2 encounters access errors when attempting to scan Targets, they are logged in Inaccessible Locations.

To view the list of inaccessible locations for a Target:
- Log into the ER2 Web Console.
- Go to Targets.
- Click the Target with the error message to go to the Target details page.
For example, click on Windows-03.

- Click ⊘ Inaccessible Locations at the bottom left of the page.
or
- Log into the ER2 Web Console.
- Go to Targets.
- Expand a Target Group with an error message in the Comments column.
- Click the error message of the impacted Target. For example, click on Critical error next to the Target Windows-03.
